一、官方文档
https://help-ads.smartnews.com/linkonly/item-3930/#i3
二、兼容版本
Theme OS 3.0
三、操作流程
准备:安装自定义代码应用,以下操作需要添加自定义代码
注意:下列代码中,注意修改自己的 **[pixel ID]**
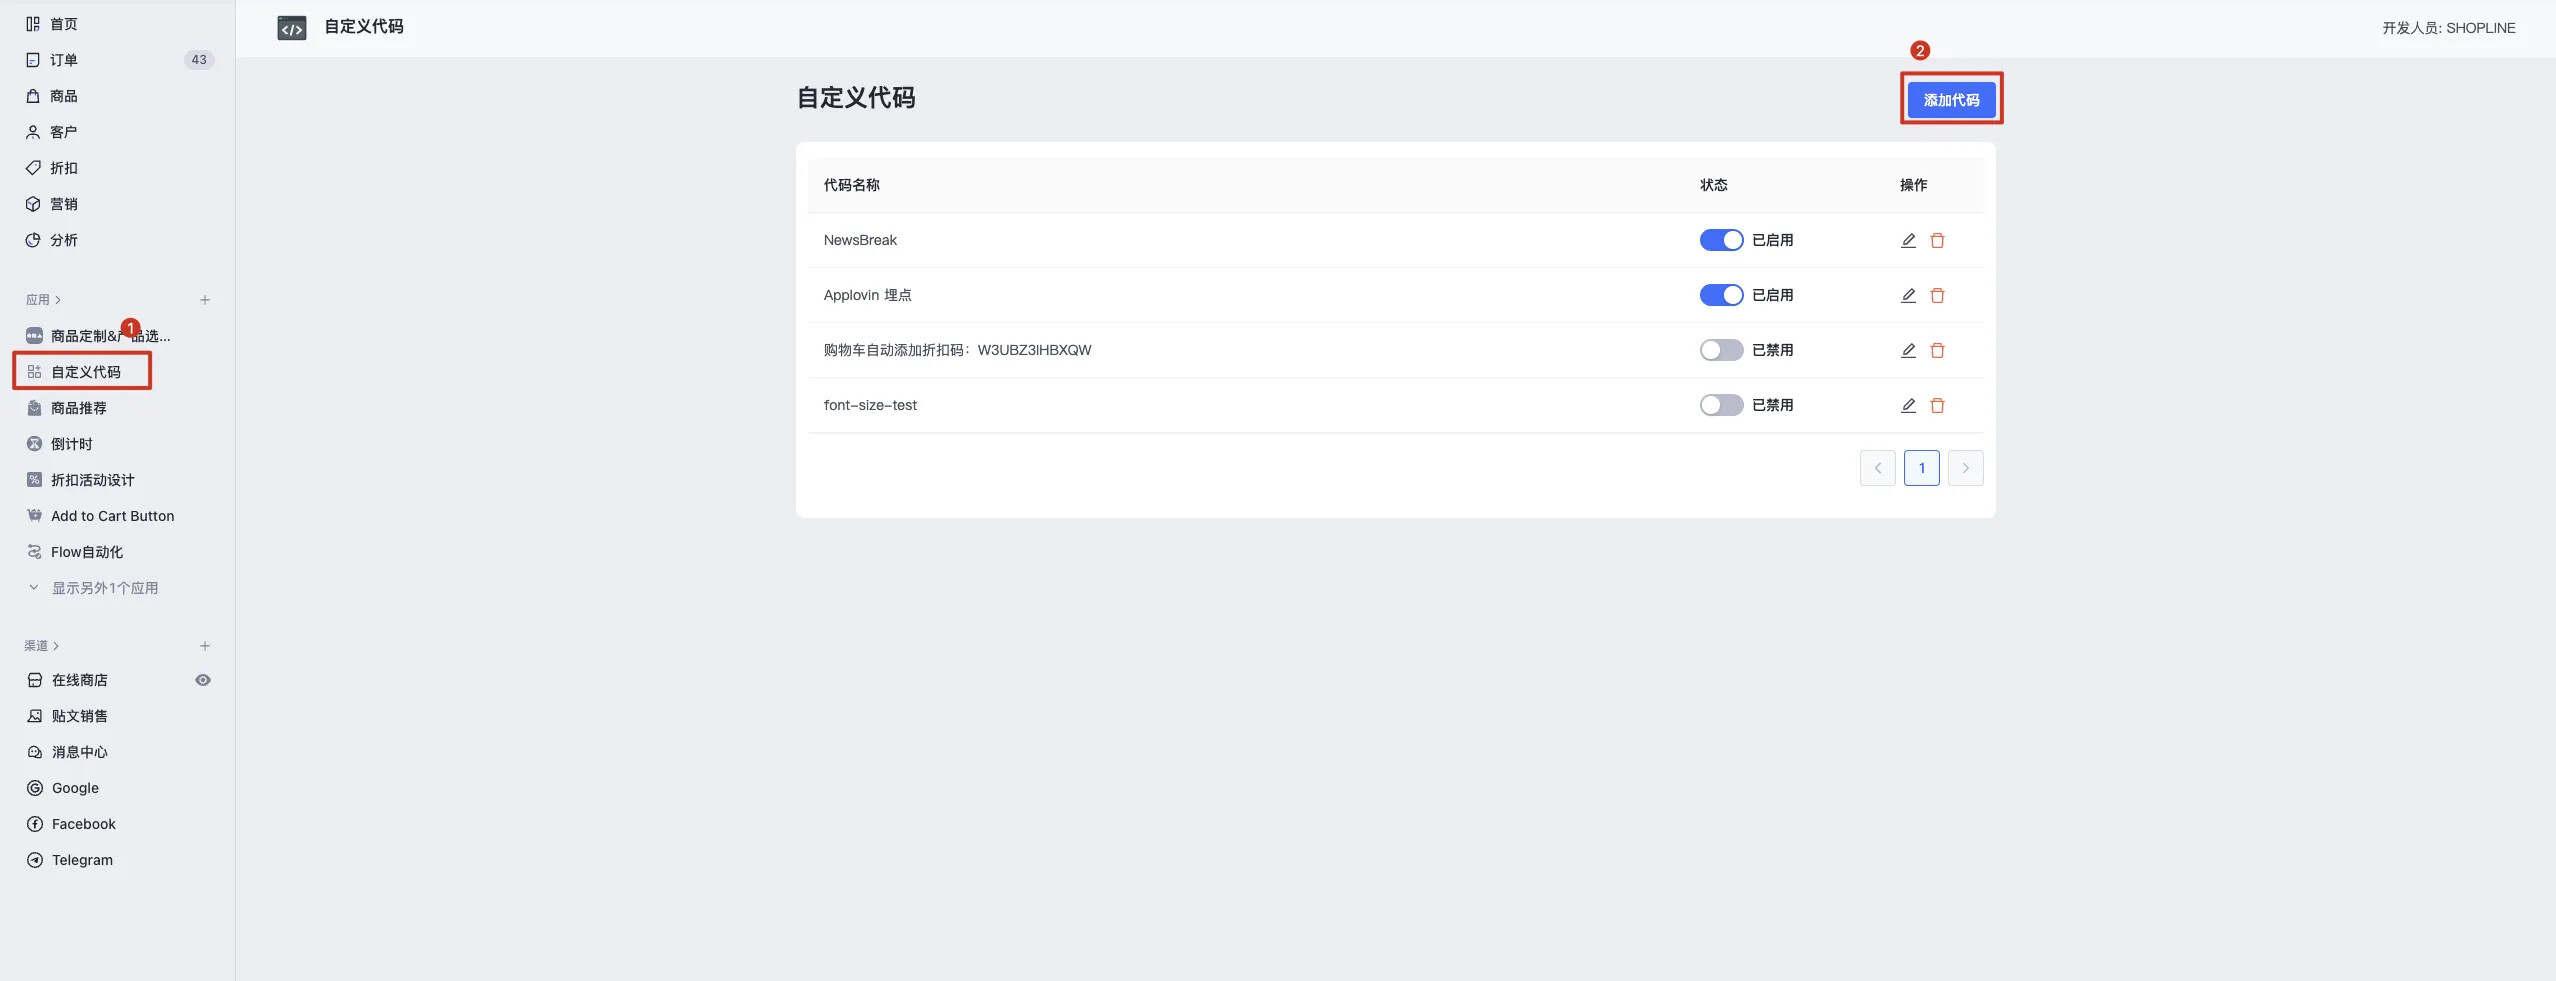
1. 通用代码安装
1.1. 添加代码,触发页面全选,插入位置顶部,语法选择 Sline
1.2. 将以下代码复制入代码内容,注意修改自己的 **[pixel ID]**
<script>
  !function(){if(window.SmartnewsAds=window.SmartnewsAds||{},!window.SmartnewsAds.p){var e=window.SmartnewsAds.p=function(){e.callMethod?e.callMethod.apply(e,arguments):e.queue.push(arguments)};e.push=e,e.version="1.0.1",e.queue=[];var n=document.createElement("script");n.async=!0,n.src="https://cdn.smartnews-ads.com/i/pixel.js";var s=document.getElementsByTagName("script")[0];s.parentNode.insertBefore(n,s)}}();
  SmartnewsAds.p("[pixel ID]", "PageView");
</script>
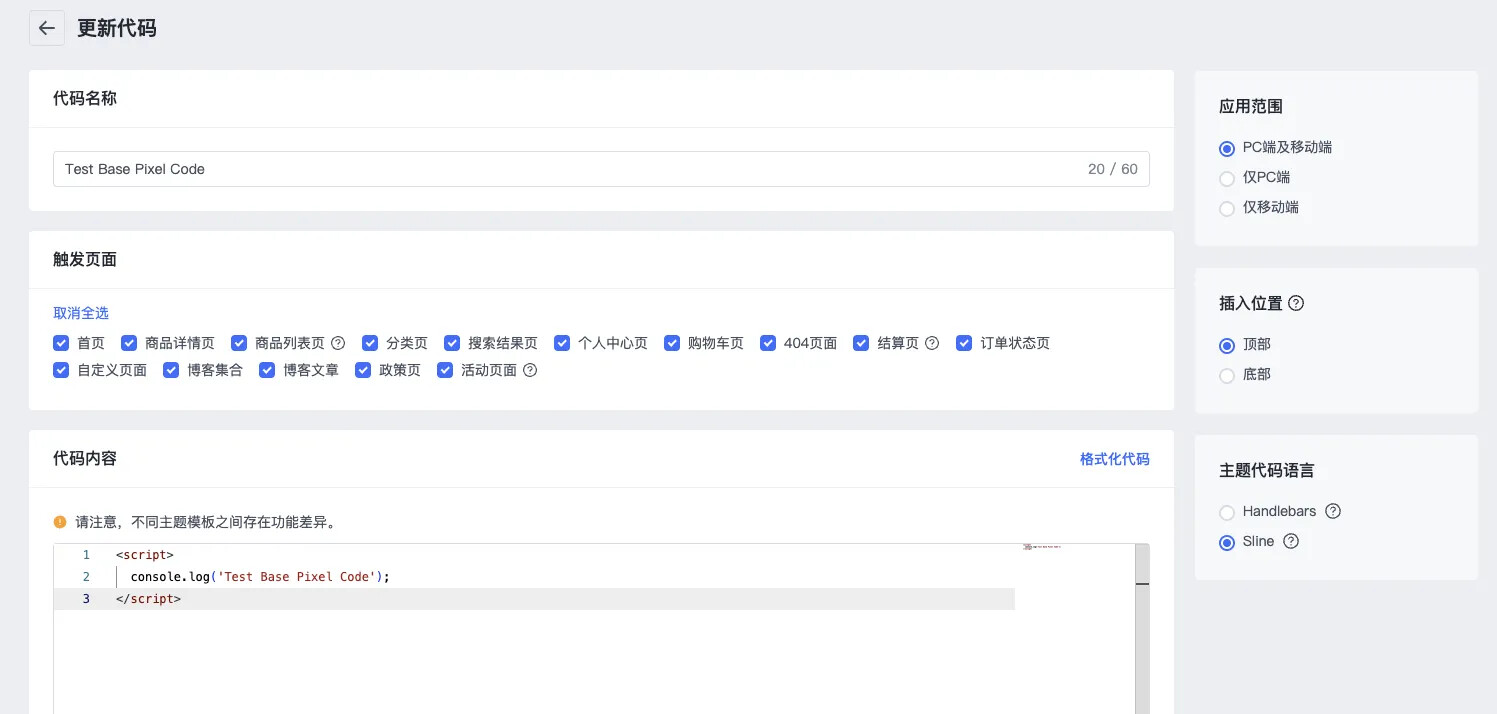
2. 加购事件
2.1. 添加代码,触发页面全选,插入位置顶部,语法选择 Sline
如果对应页面不会存在加购操作,可以不选。
2.2. 将以下代码复制入代码内容, 注意修改自己的 **[pixel ID]**
<script>
  window.themeEventCenter.addListener('variant:added', (event) => {
    SmartnewsAds.p("[pixel ID]", "AddToCart");
  });
</script>
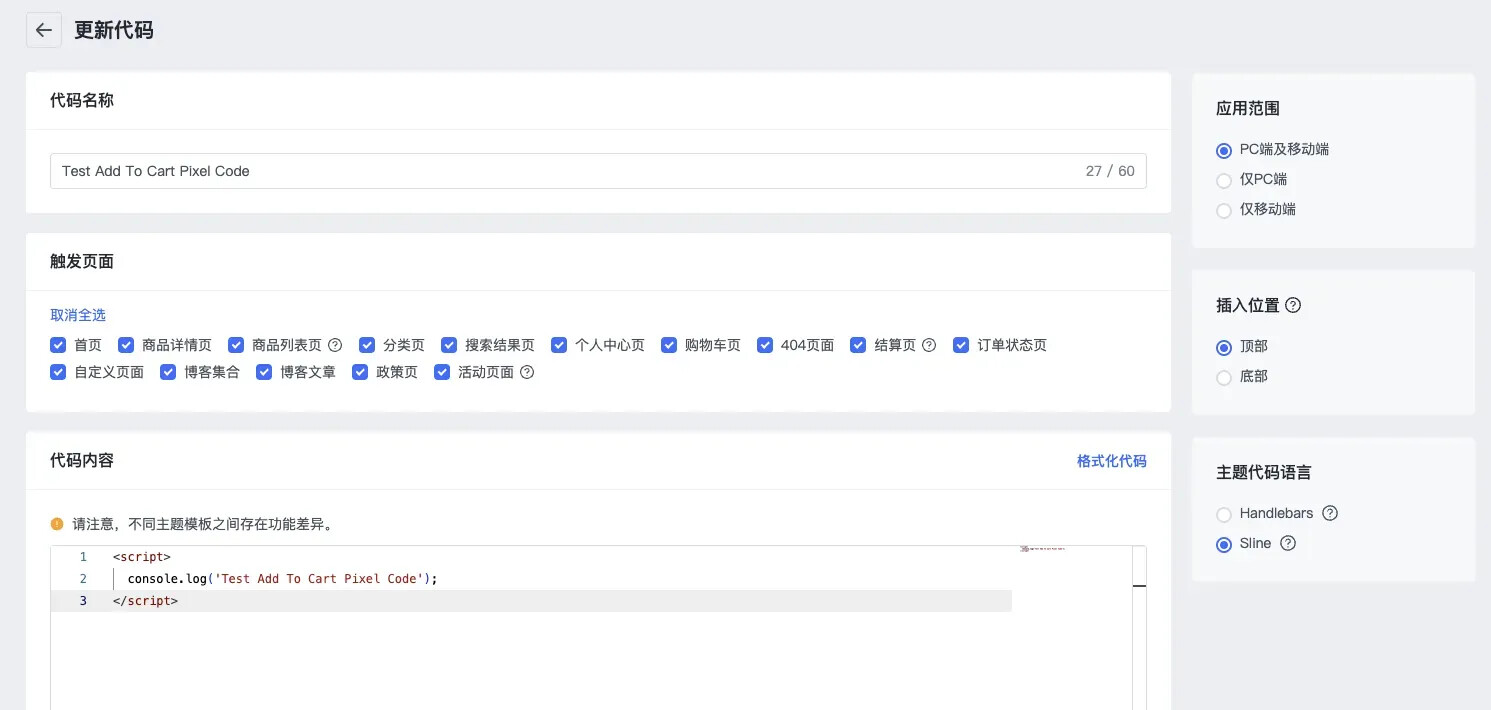
3. 商品访问事件
3.1. 添加代码,触发页面选择商品详情页,插入位置底部,语法选择 Sline
3.2. 将以下代码复制入代码内容, 注意修改自己的 **[pixel ID]**
<script>
  SmartnewsAds.p("[pixel ID]", "ViewContent");
</script>
4. 开始结账与下单成功事件
4.1. 添加代码,触发页面选择结算页,插入位置底部,语法选择 Handlebars

4.2. 将以下代码复制入代码内容, 注意修改自己的 **[pixel ID]**
<script>
  {{#if @root.checkout}}
    SmartnewsAds.p("[pixel ID]", "InitiateCheckout");
  {{/if}}
  {{#if @root.thankyou}}
    SmartnewsAds.p("[pixel ID]", "Purchase");
  {{/if}}
</script>