安装方式
1. 使用「多平台Pixel安装助手」
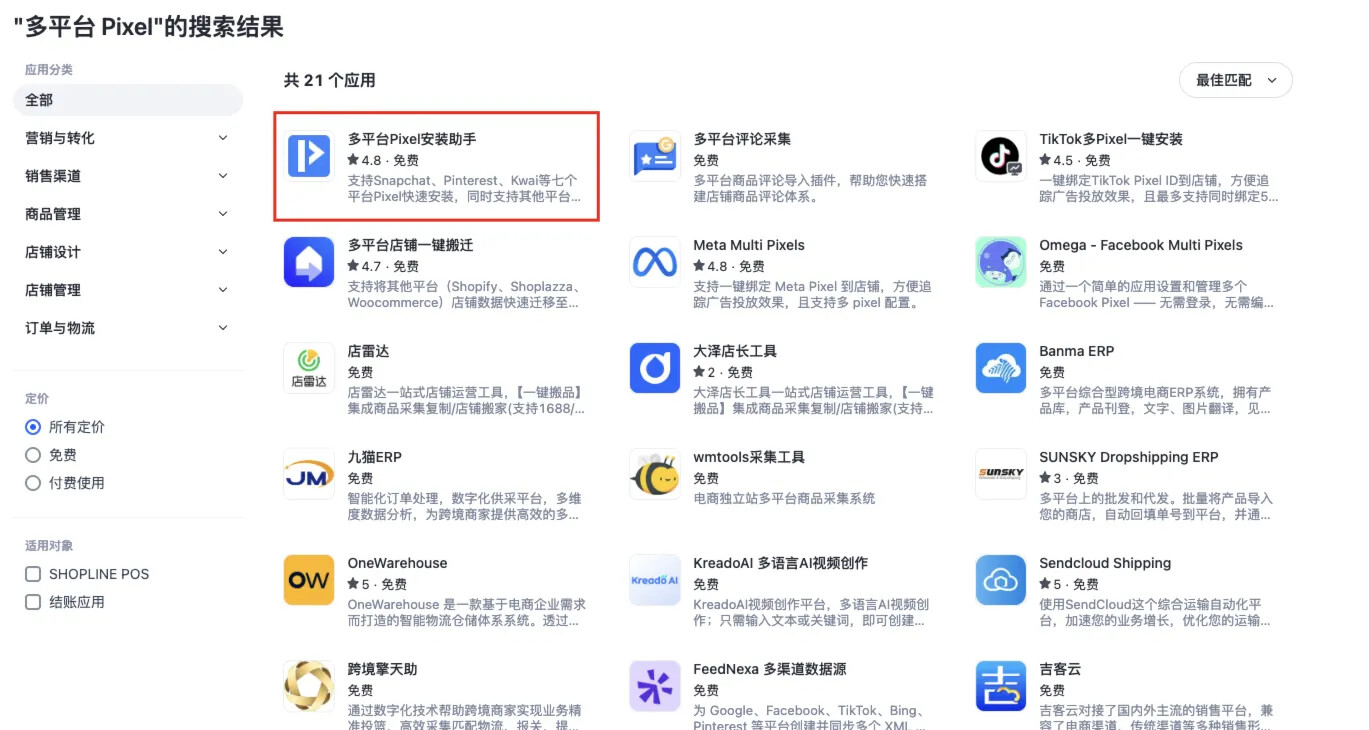
1.1. 登录 SHOPLINE 后台 → 进入「应用市场」(App Store)
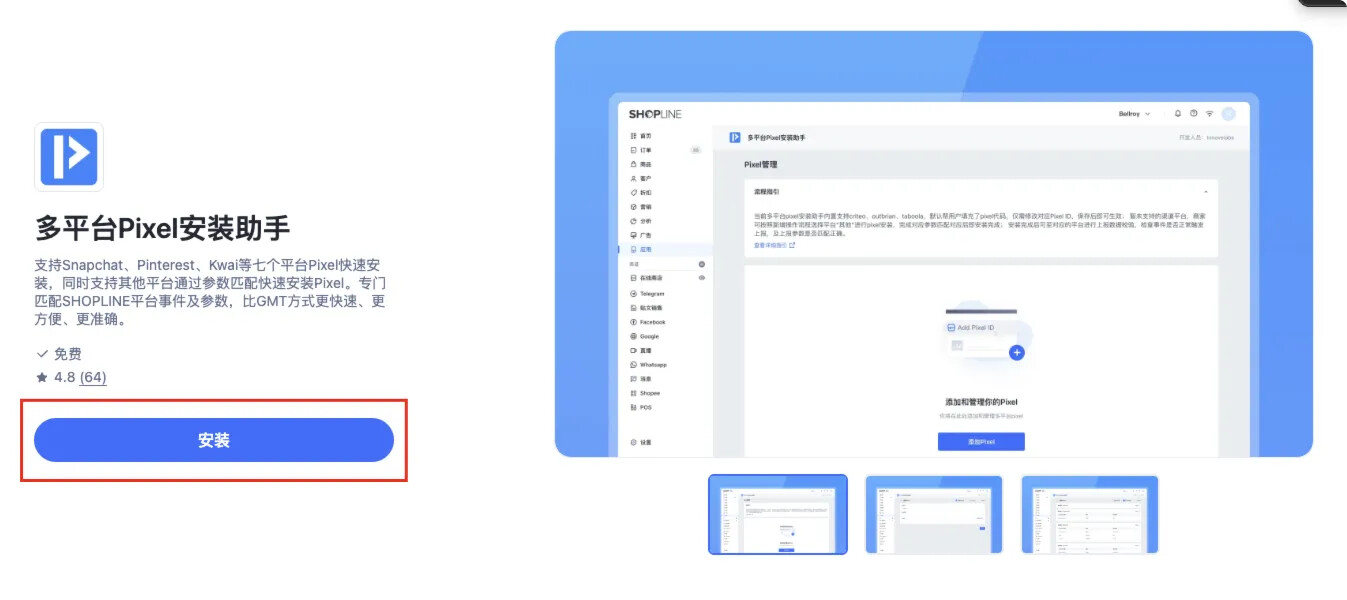
1.2. 搜索并安装「多平台Pixel安装助手」(Multi-platform Pixel Installation Assistant)
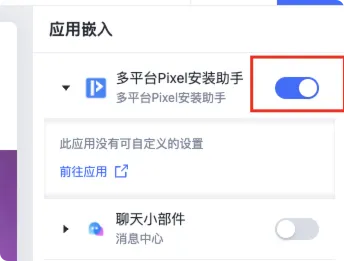
1.3. 安装完成后,点击「前往开启」,进入主题编辑器启用该助手
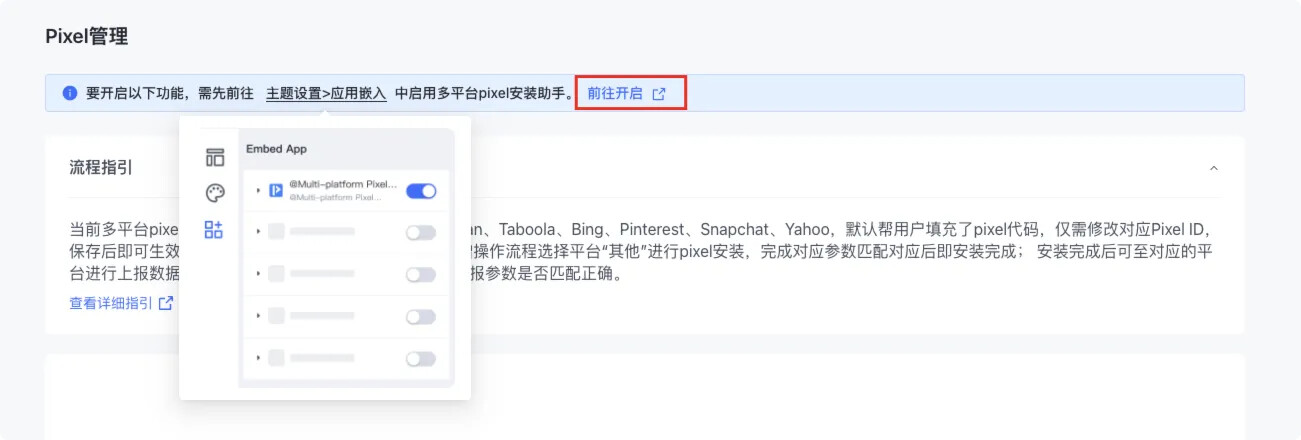
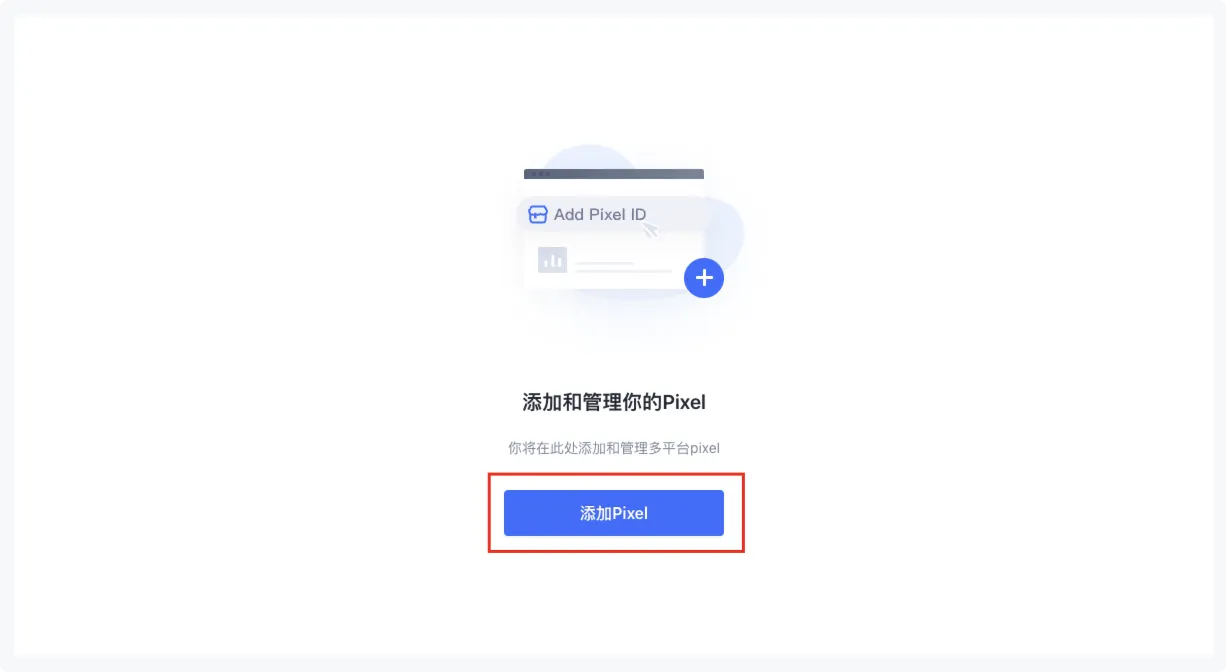
1.4. 点击「添加Pixel」
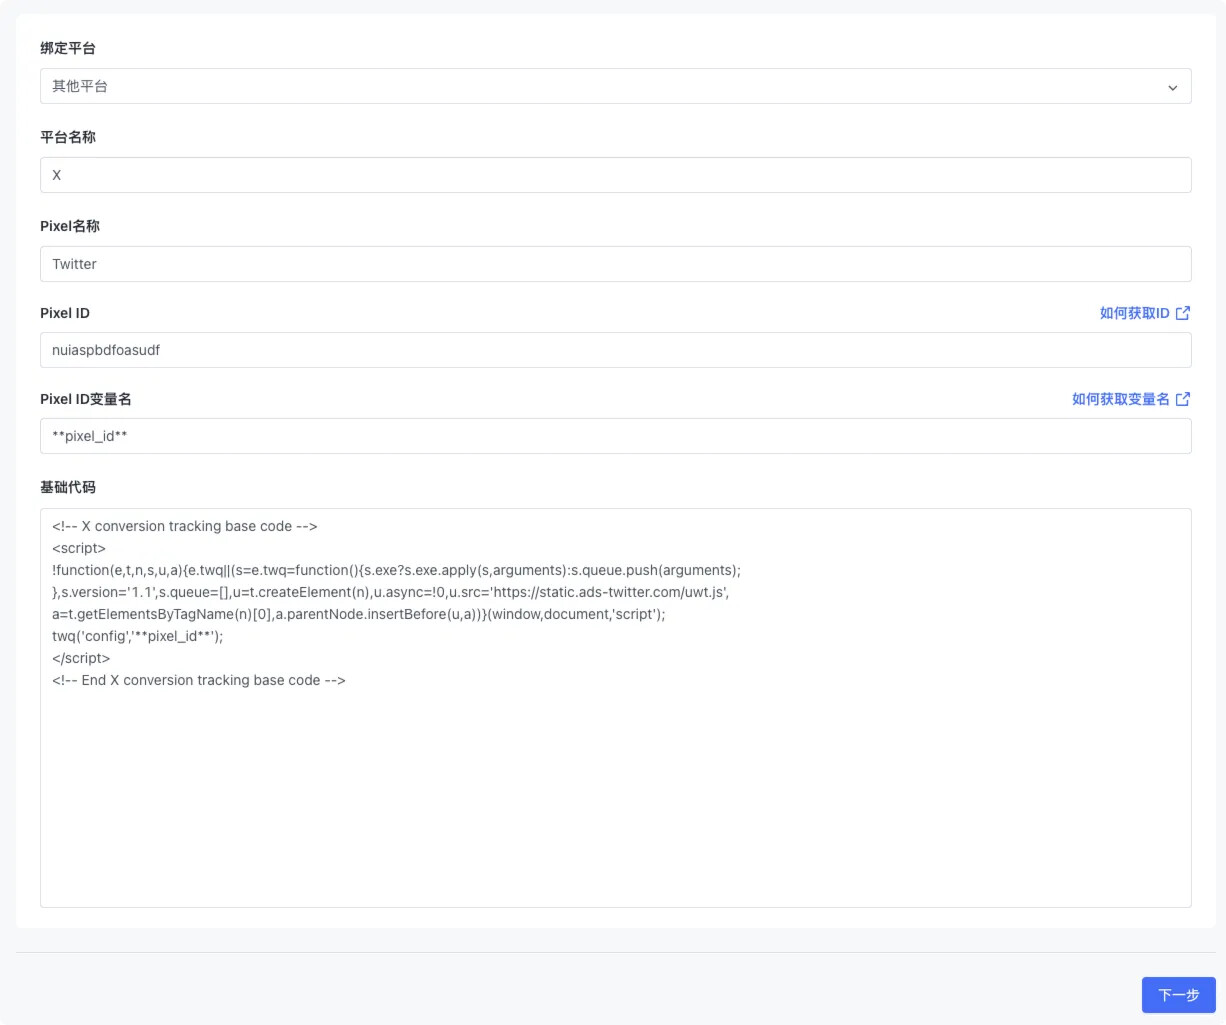
1.5. 在基础代码安装中,选「其他平台」(Other Platforms)
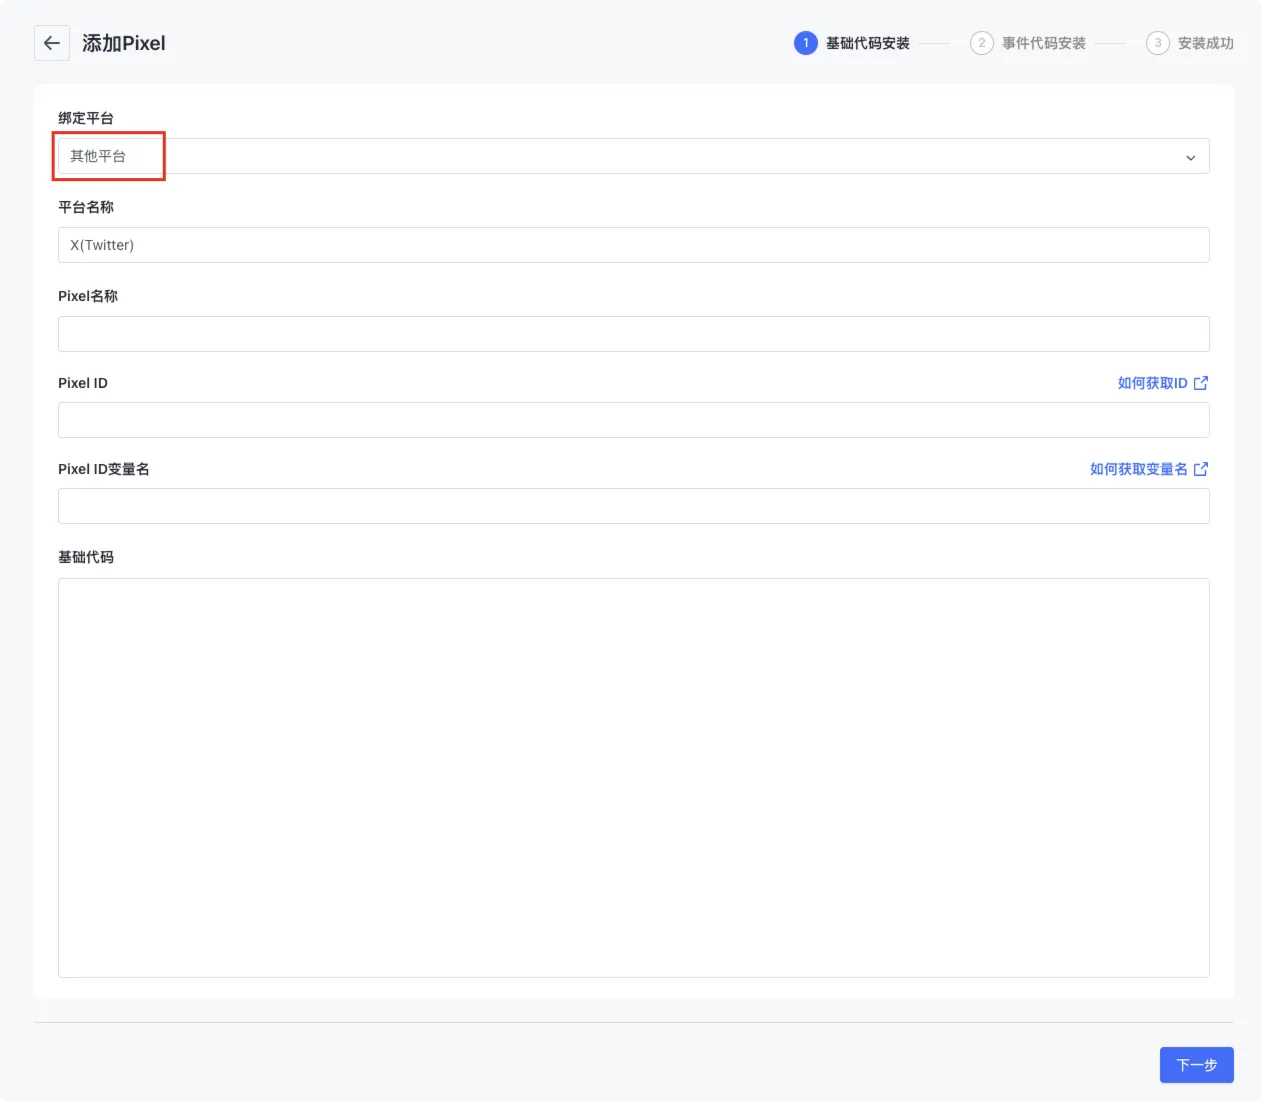
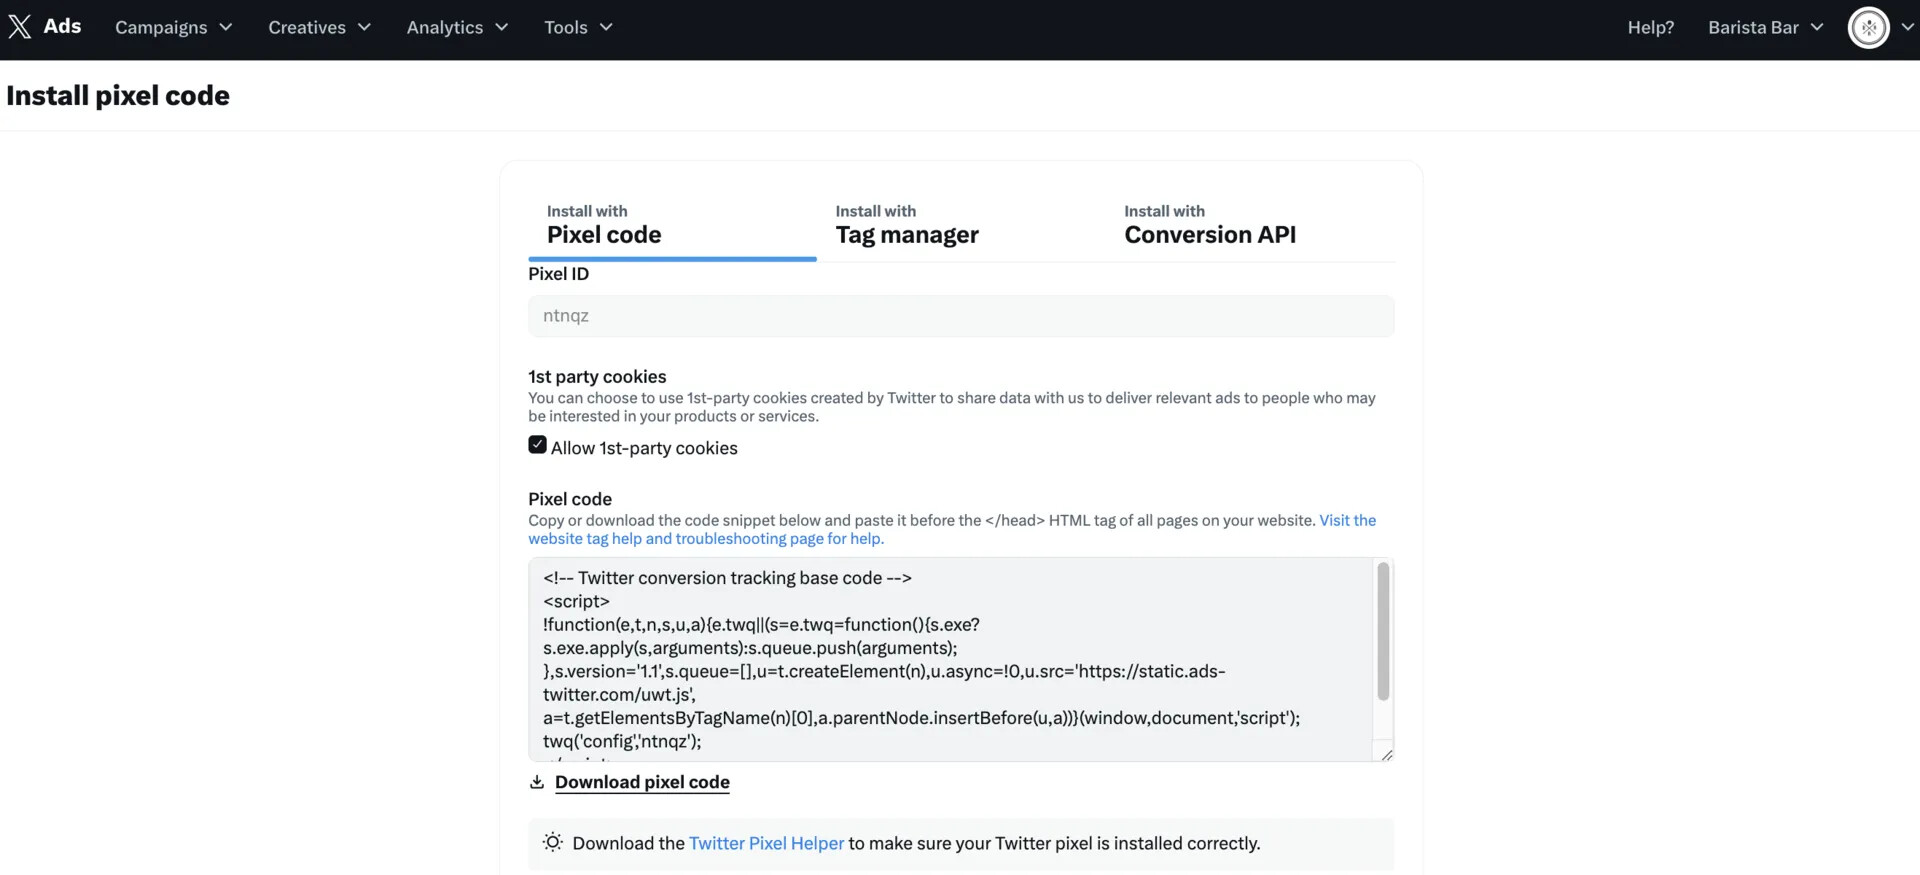
1.6. 先去 X Ads 后台获取 Pixel 信息:
具体步骤参考:
https://business.x.com/en/help/campaign-measurement-and-analytics/conversion-tracking-for-websites
- 登录 https://ads.x.com → Tools → Events Manager

- 创建或选择现有 Pixel → 复制 Pixel ID 和基础代码
1.7. 在 SHOPLINE 助手界面输入 Pixel 名称 + Pixel ID + Pixel ID变量名,并填入基础代码
-
Pixel 名称 :自定义
-
Pixel ID :根据步骤「6」获取到的填入
-
Pixel ID变量名:[pixel_id]
<script>
!function(e,t,n,s,u,a){e.twq||(s=e.twq=function(){s.exe?s.exe.apply(s,arguments):s.queue.push(arguments);
},s.version='1.1',s.queue=[],u=t.createElement(n),u.async=!0,u.src='https://static.ads-twitter.com/uwt.js',
a=t.getElementsByTagName(n)[0],a.parentNode.insertBefore(u,a))}(window,document,'script');
twq('config','[pixel_id]');
</script>
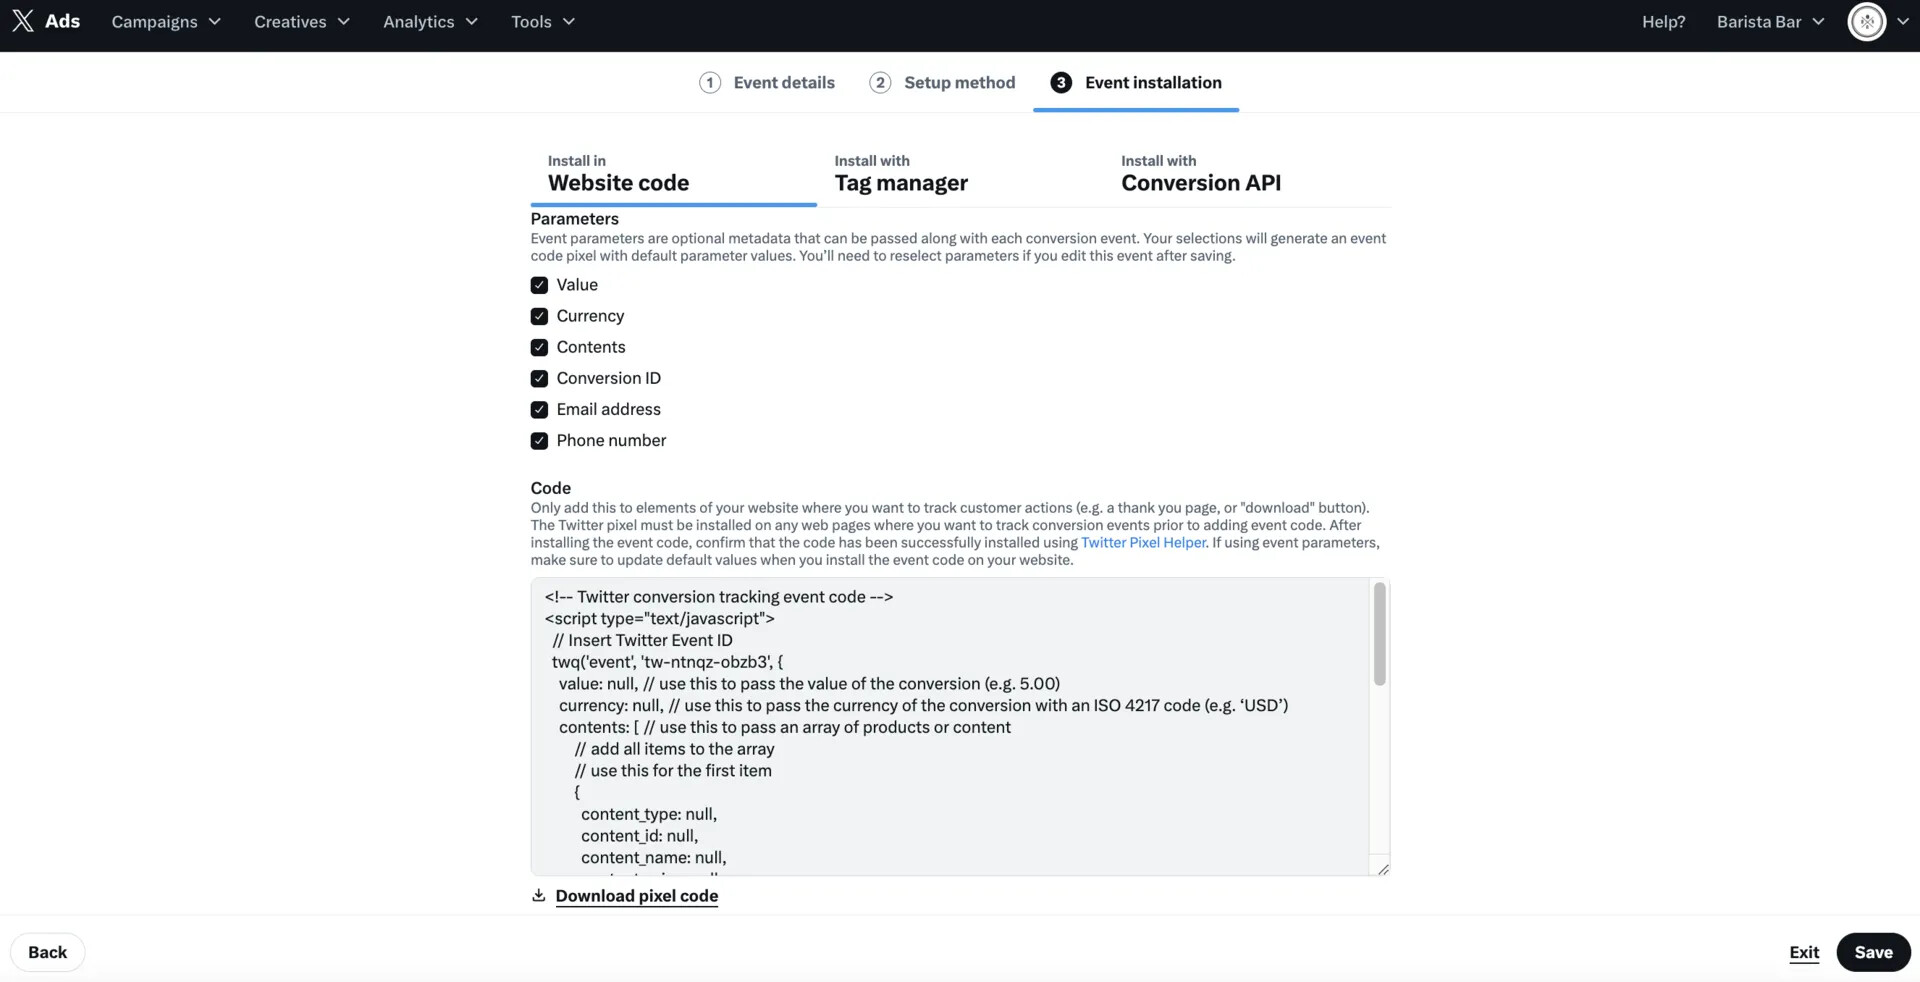
1.8. 事件映射:
复制以下代码到事件代码中,并按照下方提示设置对应参数。
1.8.1. PageView
注意:此处什么都不选
注意替换 Twitter Event ID
<script type="text/javascript">
  twq('event', 'Insert Twitter Event ID');
</script>
1.8.2. AddToCart
注意:此处仅选择 Value 和 Currency
对应参数
-
currency : [currency]
-
value :[value]
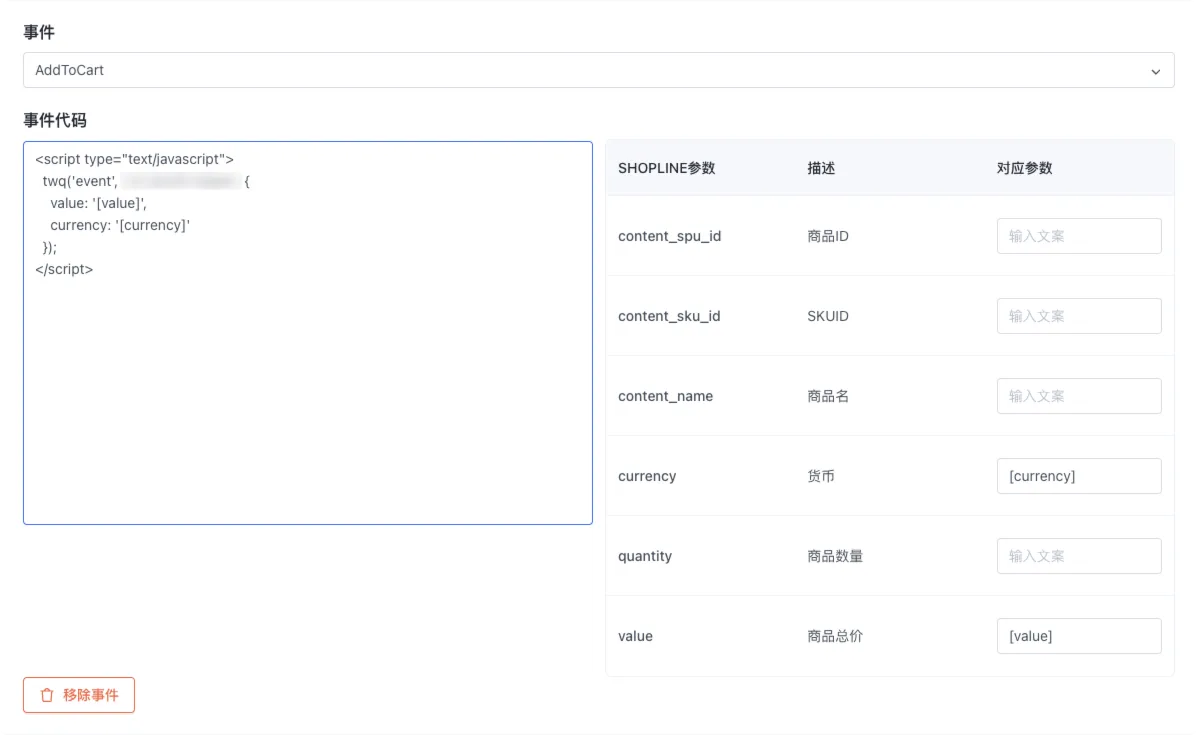
注意替换 Twitter Event ID
<script type="text/javascript">
  twq('event', 'Insert Twitter Event ID', {
    value: '[value]',
    currency: '[currency]'
  });
</script>
1.8.3. Purchase
注意:此处仅选择 Value 和 Currency
对应参数
-
currency : [currency]
-
value :[value]
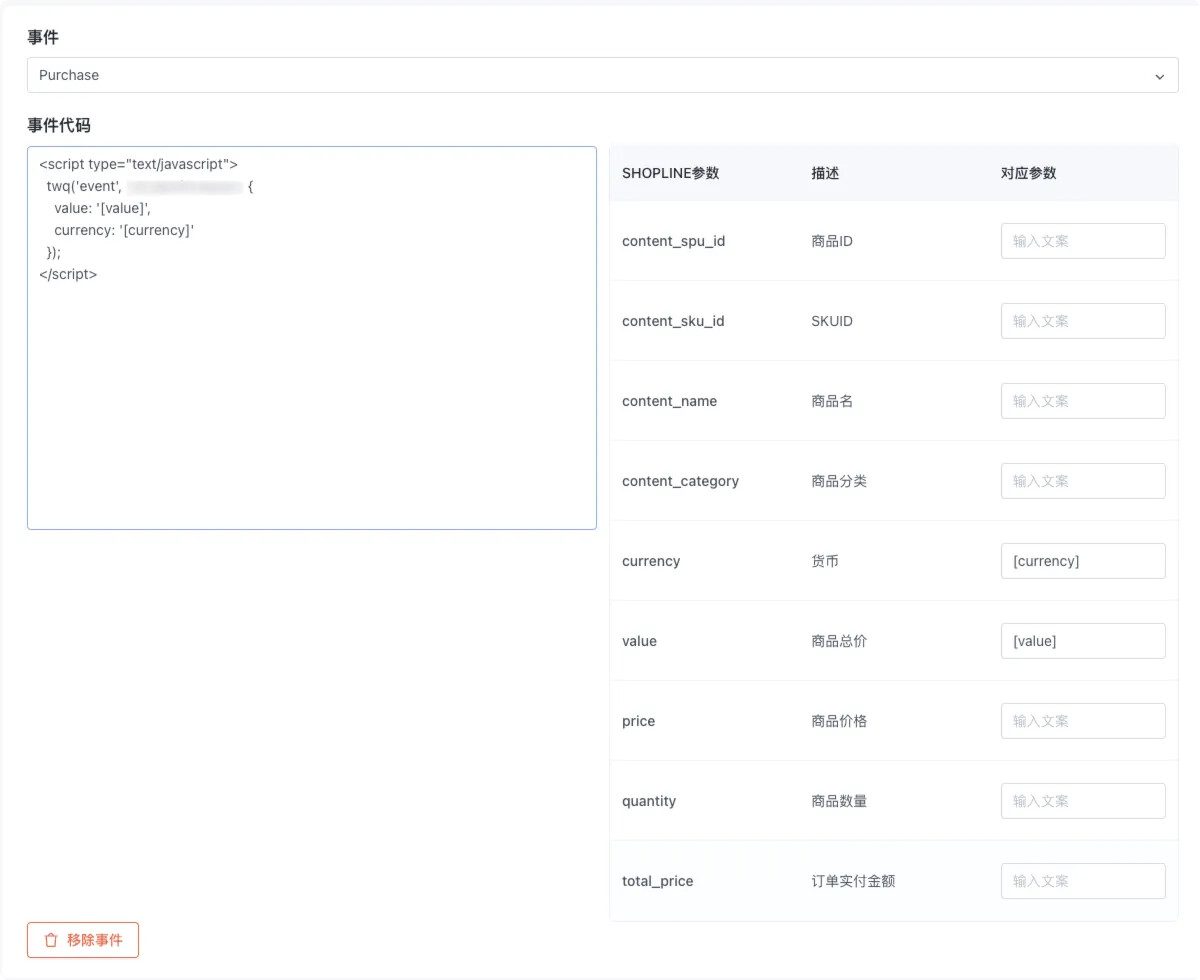
注意替换 Twitter Event ID
<script type="text/javascript">
  twq('event', 'Insert Twitter Event ID', {
    value: '[value]',
    currency: '[currency]'
  });
</script>